Generating & Editing Policies
When You'll Generate Policies
Policies are created during the Governance, Risk & Compliance stage of your Journey, or anytime from the Policies page in the left sidebar. Click on any policy tile to open its workflow.
Step 1: Complete the Policy Survey
Each policy starts with a survey -- a series of questions about your organization that ensure the generated policy reflects your actual environment, not a generic template. The workflow has three tabs: Survey, Review Document, and Approve.
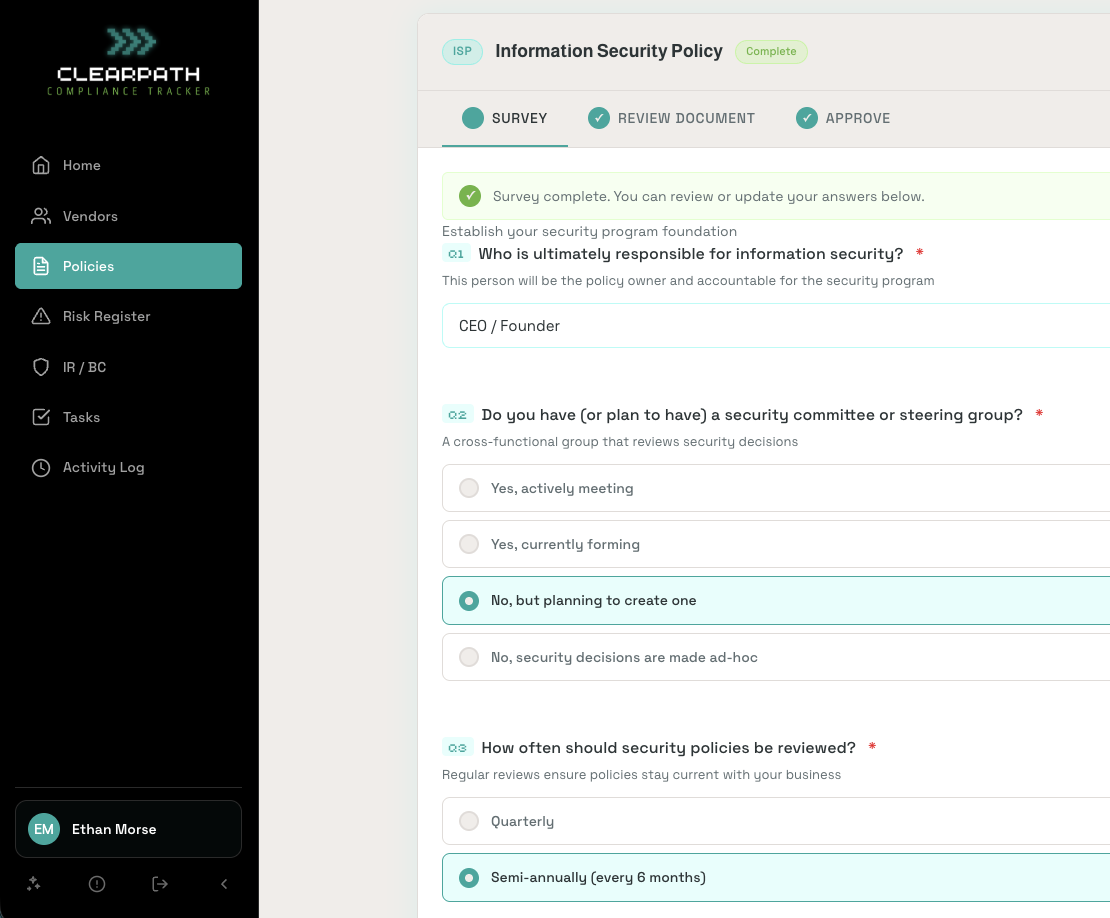
Smart defaults from your Business Context are pre-filled where applicable, so you won't need to re-answer the same questions across different policies.
If you already have an existing policy document, you can upload it directly instead of completing the survey.
When you're done, click Complete Survey.
Step 2: Review Document
ClearPath generates a full policy document based on your survey answers. The document opens in a rich-text editor where you can review and edit it directly. Changes save automatically.
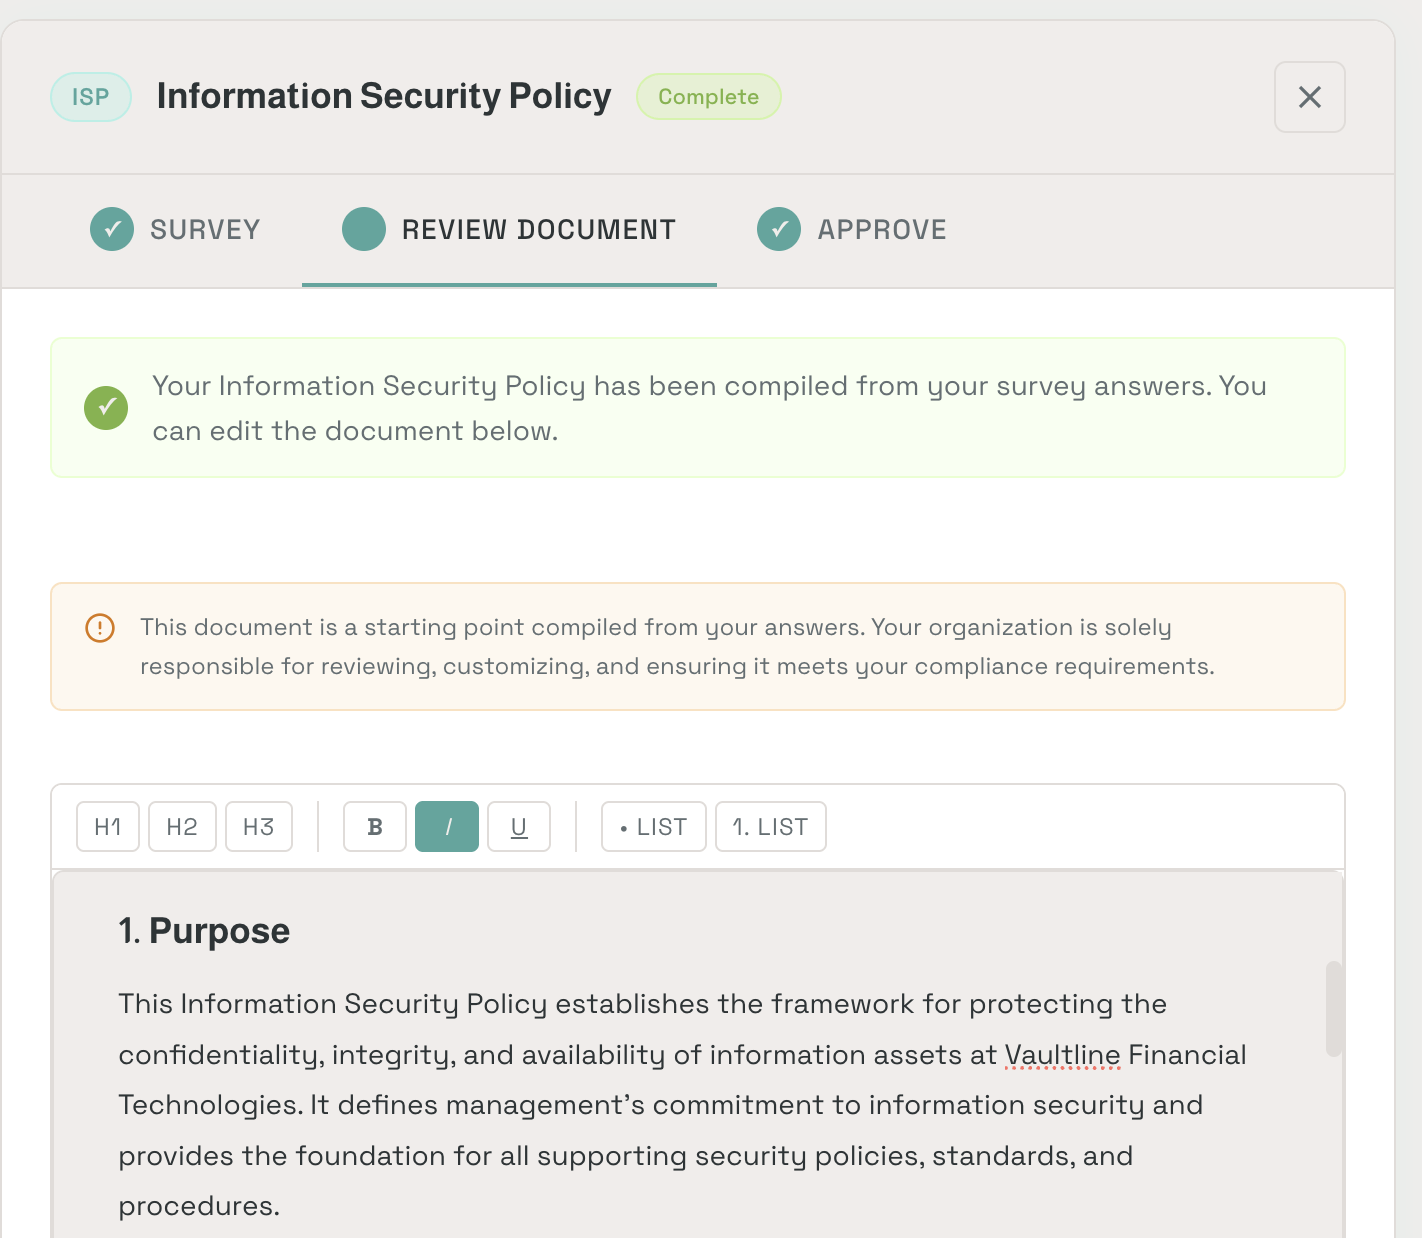
Things to review:
- Company-specific details -- Confirm names, team references, and tool mentions are accurate
- Scope statements -- Make sure the scope matches your actual operations
- Procedures -- Adjust any processes to match how your team actually works
When satisfied, continue to the Approve step.
Step 3: Approve
The final step shows a summary: policy name, status, questions answered, and whether the document was generated. Click Done to finalize, or Back to Review if you want to make more edits.
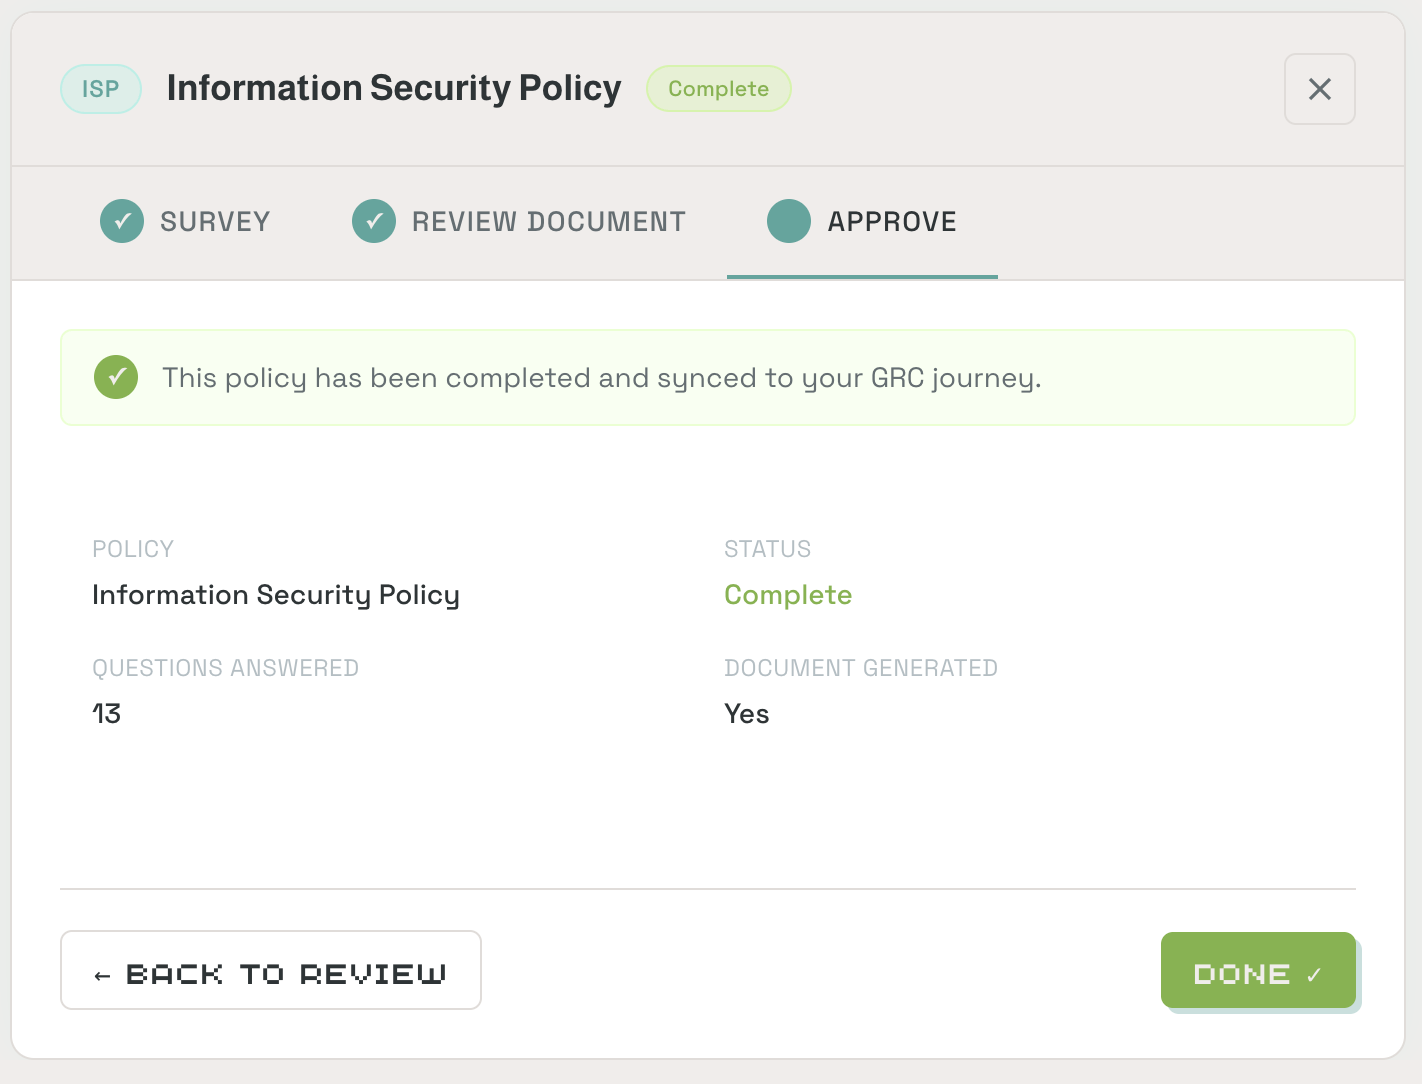
Approving a policy marks the associated controls as Compliant across all mapped frameworks.
Approved policies can still be edited later if your practices change. Re-approval will be required after significant edits.
Accessing Your Policies
All policies are available under the Policies tab in the left sidebar. Each policy tile shows its current status and the workflow step tabs (Survey, Review, Evidence, Approve) so you can see exactly where you left off.