Adding and Managing Vendors
Why Vendor Management Matters
Every third-party tool or service your company uses is a potential risk vector. Auditors expect you to maintain a list of your vendors, understand what data they access, and verify their security posture.
Accessing the Vendor Register
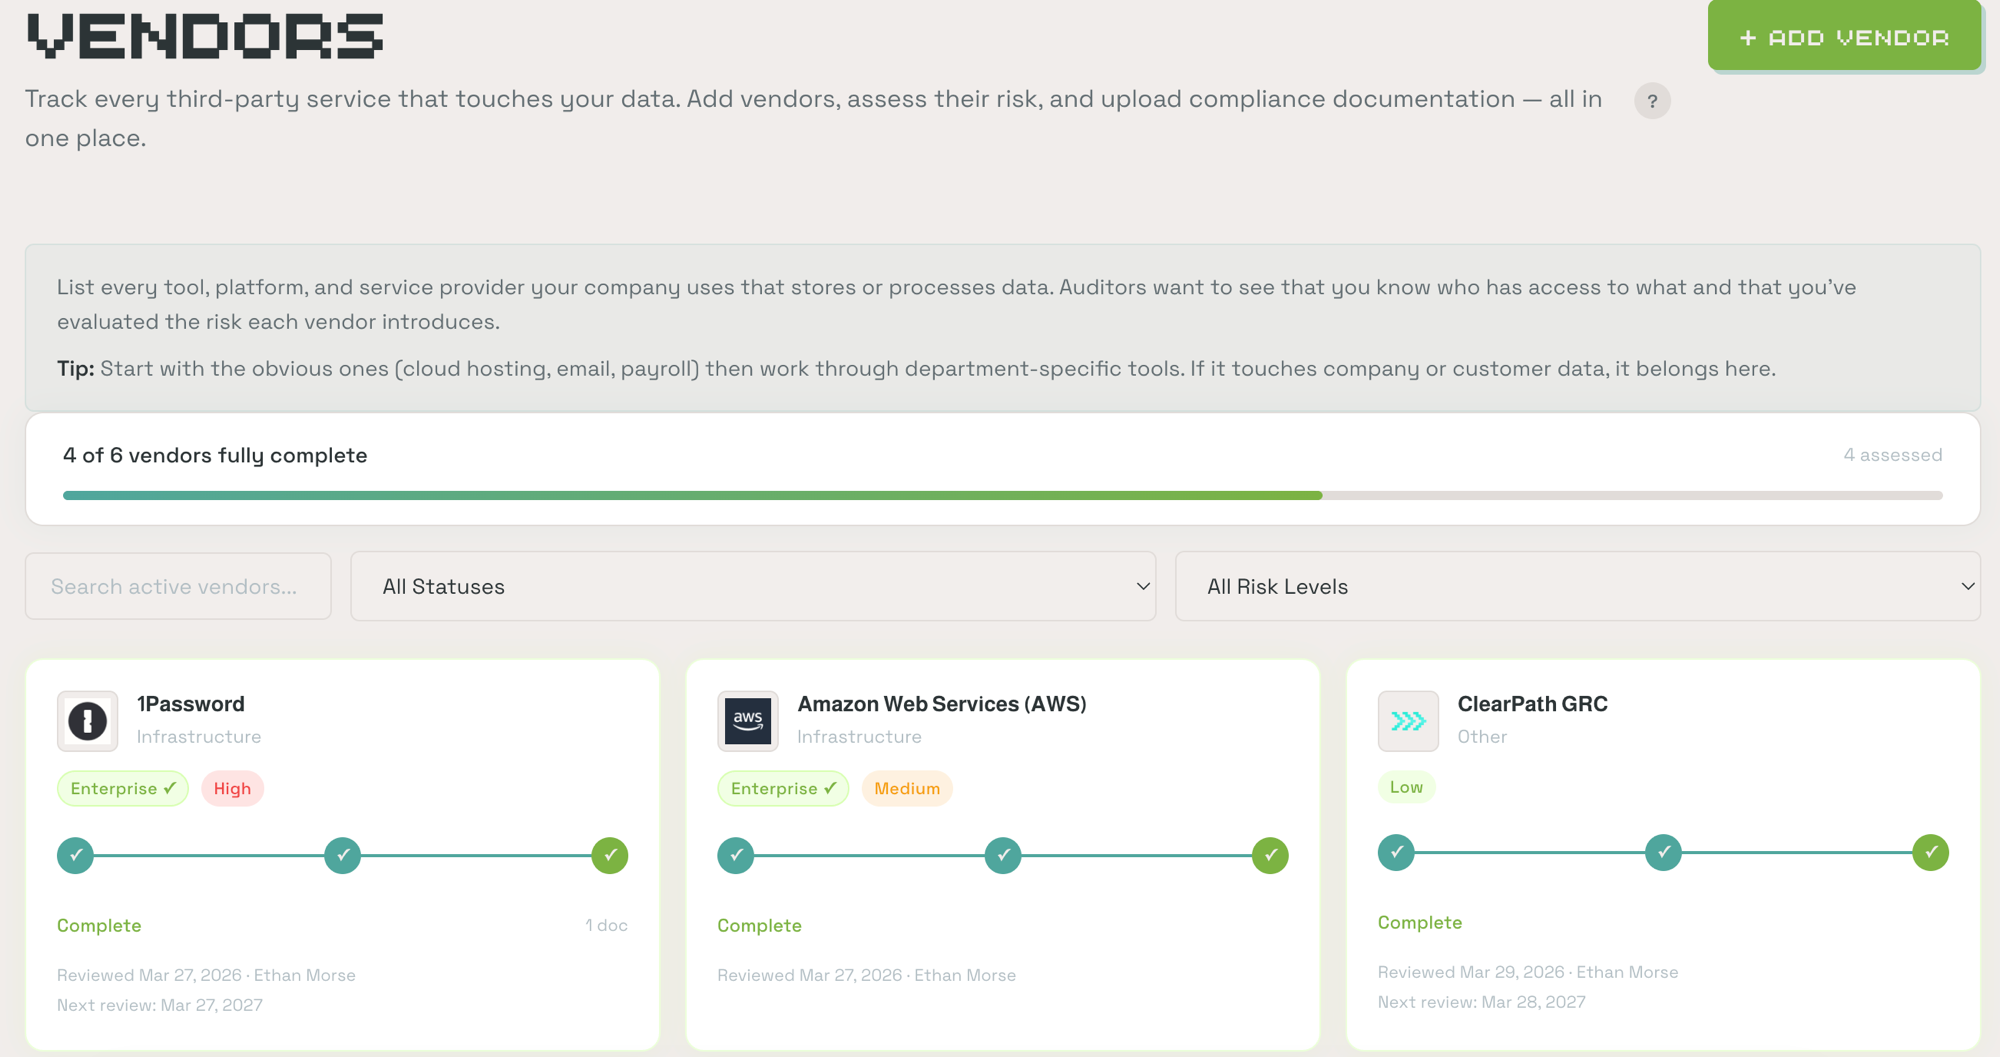
Click Vendors in the left sidebar. You'll see vendor tiles showing each vendor's name, category, risk level, and workflow progress.
Adding a Vendor
Click + Add Vendor. ClearPath offers two ways to add vendors:
From the Vendor Library (Recommended)
Browse a library of pre-verified enterprise vendors (AWS, Stripe, Okta, GitHub, etc.). Selecting a vendor auto-populates its details, website, logo, and trust portal link. Pre-verified vendors come with SOC 2 Type II and ISO 27001 badges already confirmed, with a suggested risk level of "Low."
Add Custom Vendor
If your vendor isn't in the library, click Add Custom Vendor. Enter:
- Vendor name
- Category -- Cloud Infrastructure, Identity & Access, Collaboration, File Storage, Development, HR, CRM & Sales, Customer Support, Analytics, Payments, Email & Marketing, or Other
Custom vendors start with unknown compliance status and require manual assessment.
The 3-Step Vendor Workflow
Each vendor follows a 3-step workflow: Identify → Assess → Document.
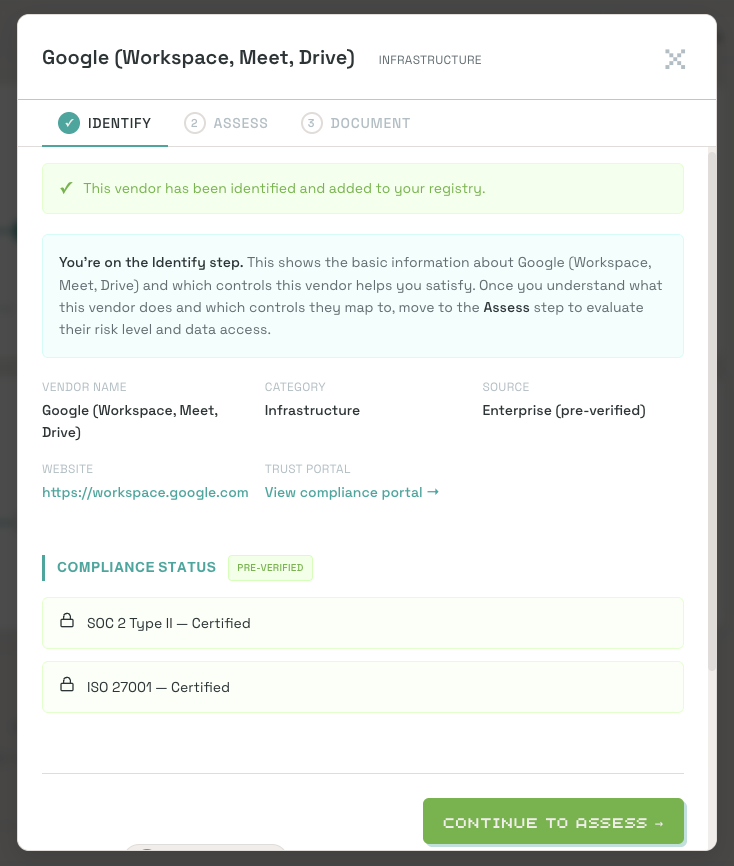
Step 1: Identify
Review vendor details: name, category, source (enterprise, library, or custom), website, and trust portal link (for enterprise vendors). For custom vendors, set initial compliance status:
- SOC 2 Status -- Attested, In Progress, Not Attested, or Unknown
- ISO 27001 Certified? -- Yes or No / Unknown
Step 2: Assess
Answer questions about the vendor's data access and risk profile:
- Data access -- Can this vendor see, store, or process your company's data?
- Data types accessed -- Select which sensitive data types are involved
- Data location -- Where does the vendor store data?
- Risk level -- ClearPath auto-suggests a level based on your answers: Critical, High, Medium, or Low
- Critical vendor? -- Whether this vendor is critical to operations
- Additional details -- Contract status, breach impact, BAA/SLA status, subprocessors, cyber insurance
Click Complete Assessment when done.
Step 3: Document
Upload compliance documentation for audit evidence:
- SOC 2 report (download from vendor's trust portal)
- ISO 27001 certificate
- Security questionnaire response
Click Mark as Complete to finish the vendor workflow.
Vendor Status Progression
Each vendor tile shows its current status:
- Needs assessment -- Step 2 (Assess) is pending
- Needs documents -- Step 3 (Document) is pending
- Complete -- All three steps finished, showing review date and next review date
Reviewing Vendors Periodically
Completed vendors show a review date and next review date. ClearPath prompts you to re-assess vendors when their review period expires. Auditors look for evidence of periodic review, not just a one-time list -- keeping your vendor documentation current is essential.